News - Black Mous Faction Tier 4 Mission Guide For Warzone 2. 0 Dmz (dmz Tips & Tricks)
Another thing that I found that was really helpful for this was to run the stuns. That way I was able to stun a group of enemies and just run up and chop them up with my knife. I was able to kill four or five enemies in a row without taking too much damage, obviously. If you had a teammate, you're going to want to be a little bit more cautious, but you should be able to plow through quite a few melee hits on the weaker enemies.
I definitely don't recommend going for any of the armored guys, as that could lead to a lot more issues. Next up, we have the golden rule.
The golden rule

This guy is going to be in two parts. Gold bars are actually not quite as rare as I thought; I had better luck finding gold bars than I did with the planning diagrams from the earlier challenge. Gold bars are kind of common in a few different places. One of the best places I recommend looking is the Sawa hotel, as you can climb on top of it and enter rooms 302 and 303.
Both of these have the potential to have gold bars in them, and honestly, in some cases. I think I found three or four between the two rooms in a single run, making it fairly easy to actually acquire these, and then once you get access to them or have enough of them in your inventory, you're going to want to make sure you B-Line it over to the junkyard and drop them once you've delivered 20 of them.

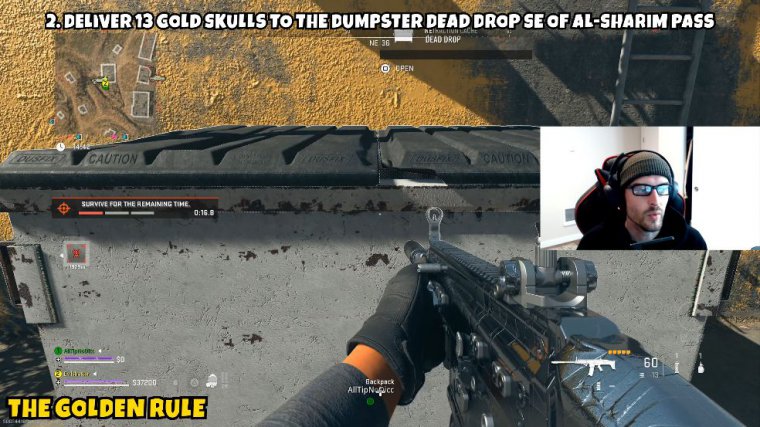
This part will be complete. Part two is going to be a little bit less common, and it's going to ask you to deliver 13 gold skulls to the dumpster at Dead Drop Southeast. Of all streams that pass again to the junkyard. Dead Drop skulls are going to be a lot more rare, though I did find them pretty consistently by looking through supply drops and looking in the Sawa hotel in rooms 302 and 303.
If you have keys, I definitely recommend going over to the chemical building at Quarry, because I was pretty lucky a few times and able to find two gold skulls in that particular building overall. I had better luck again with the 13 skulls, and I did the diagrams, which just don't make a lot of sense to me.
Once, you are able to capture 13 gold skulls, and anytime you get these, I recommend taking them straight to the junkyard as they are a lot more rare. I'm going to dead drop these once you've done it with 13 of them. This part will be.
Bullfighter

Complete Next up, we have "Bull Fighter." This one's going to be a two-parter, and it's actually one of the easiest overall to complete in this specific tier. Part one asks you to kill 30 stronghold guards. From my understanding, this should be anybody that's actually inside a stronghold or anyone that's guarding it, whether they're on top of it or not.
Enemies in the area of the stronghold, or inside of it, as I should say, are going to count towards this once you clear a few strongholds, which you will probably do to finish part two anyways, and you should be able to wipe this out fairly quickly. I would just recommend jumping in and going from stronghold to stronghold and just eliminating any of the enemies inside or clearing them.

Part two is going to be a little bit more challenging; it's asking you to execute seven AQ soldiers wielding riot shields, but remember before I said you'll be moving from stronghold to stronghold anyway to get the 30 stronghold guards you'll need to go to at least four strongholds. Maybe more, depending on your luck, to execute the seven soldiers that are asking; essentially, you just need to perform the finishing move by going up behind them and holding the melee attack.
The best way to go about this is to stun the rising shoulders, as they will kind of just stand in place, allowing you to run up behind them and perform that finishing move there. There are again two per stronghold, at least those that I found, so I was able to at least rack these up pretty quickly.
I didn't find it too challenging as long as I eliminated the other enemies around, and if you obviously have teammates, they can kind of help you out as well. Make sure no one shoots the riot shield or anything else, though, because you're going to want to make sure you execute them that way so you don't have to visit as many strongholds.
Breaking and entering

Now next up, we have our last and final mission, which is breaking in. This is going to be a three-parter, and it's unlocked by obviously completing five of the previous six missions we just went over. Part one asks you to travel to the super-underground Albagra Fortress. I definitely recommend that if it takes you a while to actually acquire the key during a run, you X-bill with that key and then just restart the run because the other part of this may not be as easy and you're going to want to utilize having as much time as possible now.
Part two is where things get quite a bit more challenging now that you're in Albaga Underground. It's asking you to reroute the seven security devices in under four minutes to unlock the system architecture's container, so you will have a very short time period. I believe the time starts at the moment you open the door, but I'm not 100 percent positive on this; it could actually be when you activate the first one.

In my first run doing this, I actually ran out of time because I was just getting bombarded by enemies and I only had one other teammate with me. Three route spots are like little electrical boxes on the wall, but unfortunately there's not a very obvious way to interact with them; there's just a little black dot that shows up.
You'll know that it worked because it'll start tallying up your progress. You'll know that you'll know that you'll know that you'll know that you'll know that you'll know that you'll know that it worked because there'll be a little black dot, and you're also going to want to move quickly for the simple fact that enemies continually come in.
From the front door, you're in here, and they're all tier threes, so you're going to want to move fast again. Any left turn you can make is obviously a left turn. You've activated all seven and rerouted the security system. You will then go to the center location where the little pool of water is, and it will have a chest in the bottom.

You will basically loop this chest and look for the documents inside once you get it; part two is essentially complete. Now, part three is a little bit easier than part two, but it can be frustrating if you manage to die on this part because it's asking you to loot and extract the system architecture and documentation, so that document that you found in the chat after rerouting.
All seven spots are going to be very important. You're going to need to obviously capture them, and you're going to want to go to your quickest and safest x-fill because you do not want to die with this and have to repeat this process. Sometimes, you get lucky and there's an x-fill straight outside of the underground.
I was not fortunate enough to have that luck in the run, where I was successful in acquiring the documentation but did have to travel a little bit, and luckily for me. I was able to eliminate the only enemy I encountered while trying to x-fill, and I x-filled safely.

 PREVIOUS Page


